Table of Contents
The city's pulse, its raw energy, and its hidden stories – all etched onto skin. That's the power of an urban tattoo sleeve. Forget generic flash art; we're diving deep into the world of personalized ink, where concrete jungles meet skin canvases. Thinking about getting an urban tattoo sleeve but feeling lost in a maze of designs? You're not alone. This article is your roadmap to navigating the vibrant landscape of urban tattoo sleeve ideas. We'll explore everything from finding the perfect style to planning the layout, and even tackling the pain factor. Ready to transform your arm into a walking work of art? We'll break down popular urban styles, discuss size and placement, and give you the inspiration you need to bring your vision to life. Whether you're drawn to gritty realism, bold geometric patterns, or the rebellious spirit of street art, we'll help you find a design that speaks to your soul. So, ditch the doubt and get ready to unleash your inner artist. Let's create an urban tattoo sleeve that's as unique and unforgettable as the city you call home.
Urban Tattoo Sleeve Ideas: Finding Your Perfect Design

Urban Tattoo Sleeve Ideas: Finding Your Perfect Design
Brainstorming Your Urban Landscape
So, you want an urban tattoo sleeve? Awesome! First things first, let's ditch the generic skyscraper silhouettes. Think deeper. What does "urban" mean to you? Is it the gritty alleys of your neighborhood, the vibrant street art scene, or the architectural marvels that pierce the sky? Maybe it's the energy of the crowds, the constant hum of traffic, or the hidden pockets of green that offer a respite from the concrete jungle. Jot down everything that comes to mind. No idea is too silly or too out-there at this stage. We're building a foundation here.
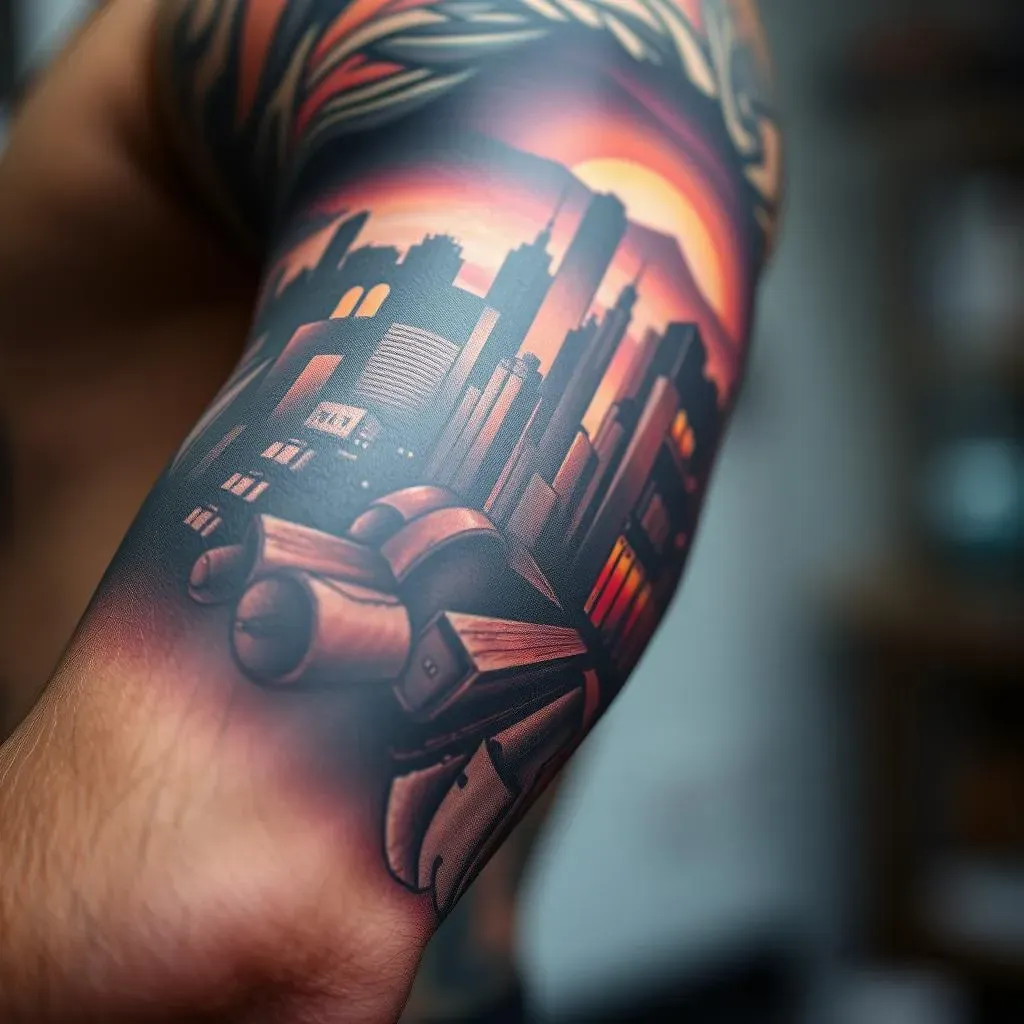
Consider your personal connection to the urban environment. Did you grow up in the city? What are your favorite landmarks? What feelings does the urban landscape evoke in you? Nostalgia? Excitement? A sense of belonging? These personal touches will make your tattoo sleeve truly unique and meaningful. Don't be afraid to get specific. Instead of just "city skyline," think about *your* city's skyline at *sunset*, with the specific buildings that hold significance for you. This is where the magic happens.
Style Exploration: From Realism to Abstraction
Now that you have a solid list of urban elements, let's explore different tattoo styles. Are you drawn to hyper-realistic depictions of cityscapes, complete with every brick and window pane? Or do you prefer a more abstract approach, using geometric shapes and bold colors to capture the essence of urban life? Maybe you're into the raw, unfiltered aesthetic of graffiti art, or the clean lines and minimalist designs of modern architecture. There's no right or wrong answer here. It's all about finding a style that resonates with your personal taste and the overall vibe you're going for.
Don't limit yourself to just one style! You can blend different styles to create a truly unique and dynamic tattoo sleeve. For example, you could combine realistic elements with abstract patterns, or incorporate graffiti-inspired lettering into a more traditional design. The key is to experiment and see what works best for you. Look at tattoo portfolios online, browse through magazines, and pay attention to the art you see around you in the city. The more inspiration you gather, the better equipped you'll be to make informed decisions about your design.
Finding the Right Artist: A Crucial Step
This is HUGE. You've got an amazing concept brewing, but it's only as good as the artist who brings it to life. Do your research! Instagram is your friend here. Search for artists specializing in the style you're after (realism, geometric, etc.). Look at their healed work, not just fresh tattoos – that's how you see the true quality. Read reviews. Talk to people who have been tattooed by them. Don't just pick the cheapest option. This is going on your body forever, so invest in quality.
- Check portfolios: Look for consistent quality and a style that matches your vision.
- Read reviews: See what other clients have to say about their experience.
- Consultation is key: A good artist will listen to your ideas and offer valuable feedback.
Once you've narrowed down your options, schedule consultations with a few artists. This is your chance to discuss your ideas in detail, ask questions, and get a feel for their personality and expertise. A good artist will be able to take your vision and translate it into a stunning tattoo sleeve that you'll be proud to wear for years to come.
Street Art to Skin Art: Urban Tattoo Sleeve Styles
Street Art to Skin Art: Urban Tattoo Sleeve Styles
Graffiti & Street Art Inspired Sleeves
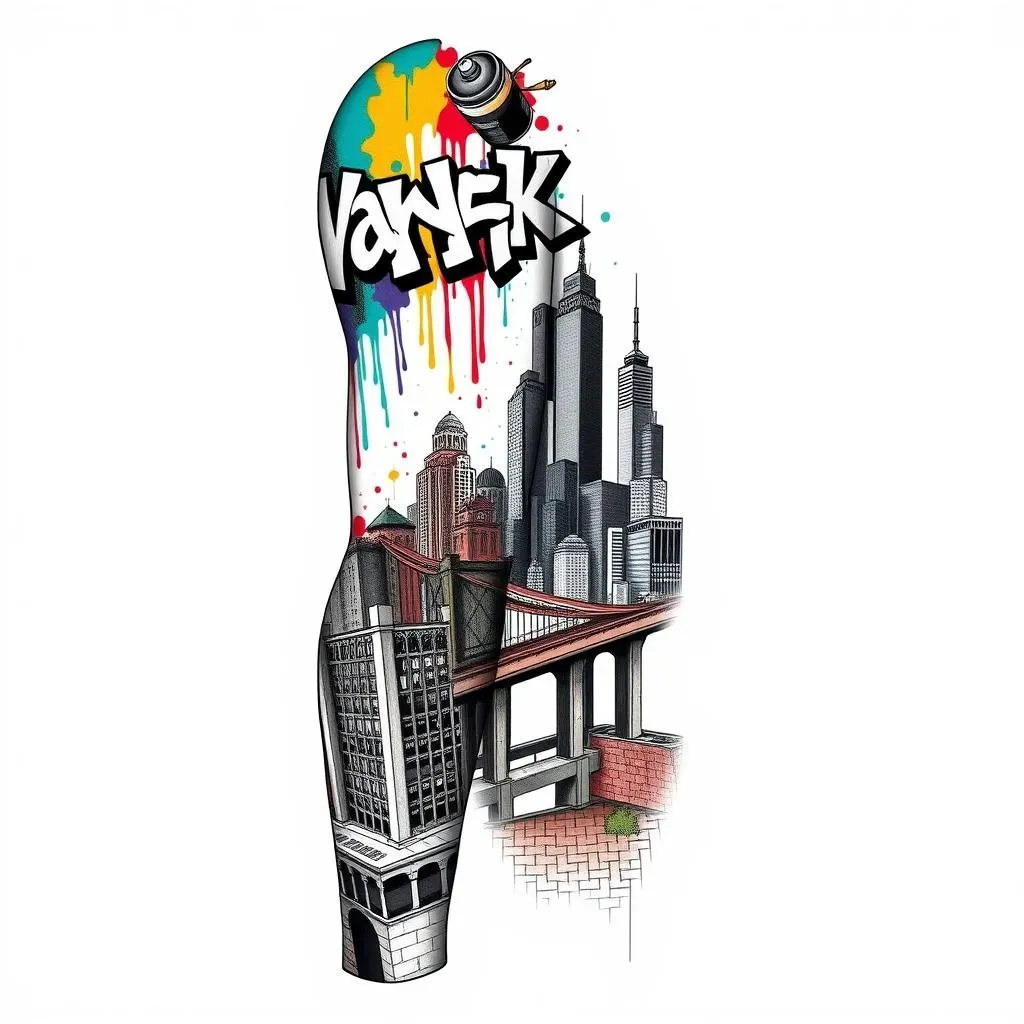
let's talk rebellious self-expression. Think beyond just copying a Banksy stencil (though, no judgment if you're a fan!). A true street art-inspired sleeve captures the energy and raw creativity of the urban landscape. We're talking bold colors, dynamic lines, and a sense of organized chaos. Imagine incorporating elements like dripping paint, stylized lettering, and iconic street art imagery – think boomboxes, spray cans, or even a nod to your favorite local mural. The beauty of this style is its inherent imperfection; it's meant to look a little rough around the edges, just like the streets themselves.
To make it your own, consider the specific street art styles that resonate with you. Are you drawn to the intricate details of photorealistic graffiti, the bold simplicity of stencil art, or the abstract expressionism of taggers? Research different artists and techniques, and think about how you can incorporate those elements into your sleeve. Maybe you could even collaborate with a local street artist to design a truly unique and authentic piece. Just remember to get their permission first!
Architectural & Geometric Urban Sleeves
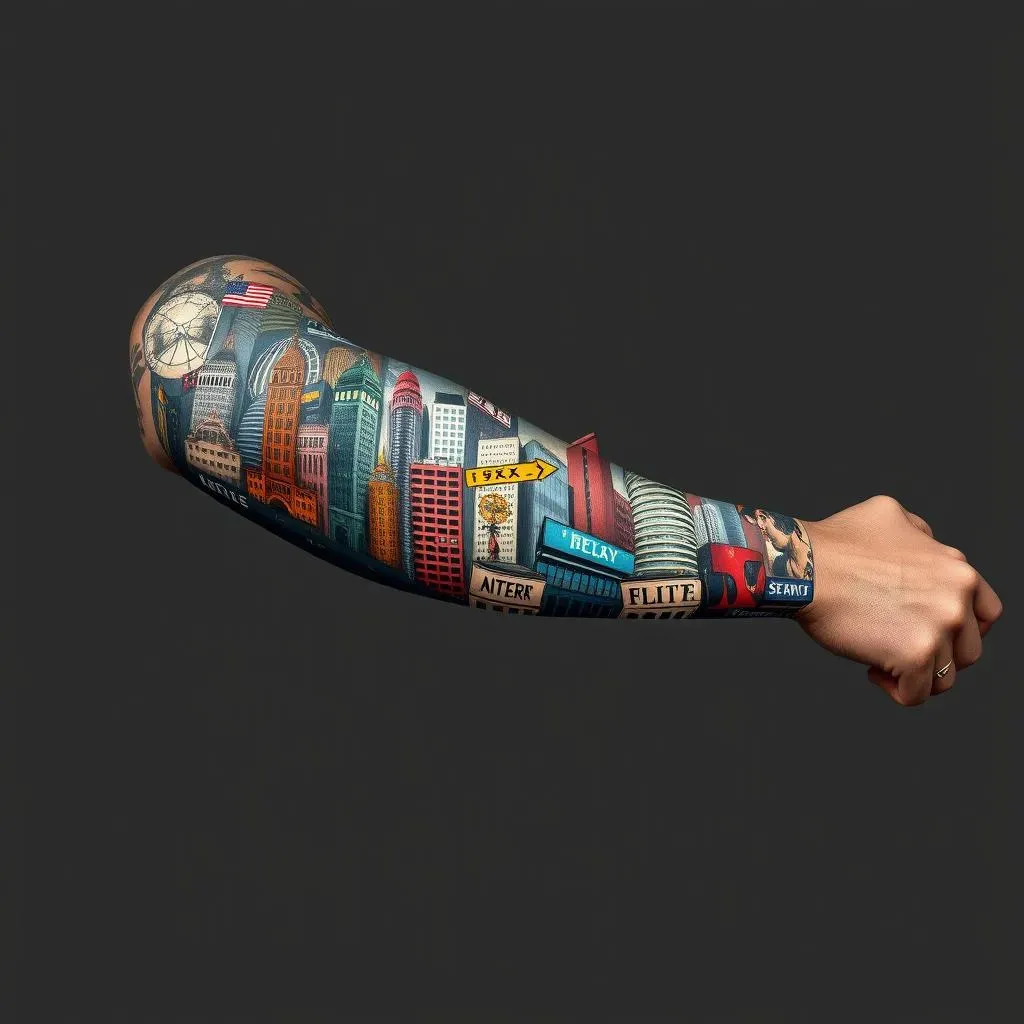
If you're more into clean lines and structured designs, an architectural or geometric urban sleeve might be your jam. This style focuses on the shapes, patterns, and structures that define the urban landscape. Think towering skyscrapers, intricate bridge designs, or the repetitive patterns of brick walls and subway tiles. The key here is precision and detail. A skilled artist can create stunning optical illusions and a sense of depth by playing with perspective and shading.
Consider incorporating elements like blueprints, maps, or even the golden ratio to add a layer of intellectual intrigue to your sleeve. You could also play with negative space to create hidden images or patterns within the design. This style is all about celebrating the beauty and complexity of the urban environment in a sleek and sophisticated way. Plus, it's a great conversation starter. Who wouldn't want to ask about the meaning behind that Escher-esque masterpiece on your arm?
Planning Your Urban Tattoo Sleeve: Size, Placement, and Pain
Planning Your Urban Tattoo Sleeve: Size, Placement, and Pain
Sizing It Up: How Much Skin Are We Talking?
Alright, so you're buzzing with ideas, but let's get real about the canvas. How big do you want this urban tattoo sleeve? A full sleeve, wrapping from shoulder to wrist, is a serious commitment, offering maximum real estate for a sprawling cityscape or a complex narrative. A half-sleeve, typically from shoulder to elbow or elbow to wrist, is a more manageable option, allowing for a detailed design without completely dominating your arm. And then there's the quarter-sleeve, covering just the upper arm or forearm – a great choice if you want a smaller, more subtle piece.
Think about the level of detail you want to incorporate. A highly detailed realistic design will require more space than a minimalist geometric pattern. Also, consider your personal style and how the tattoo will fit into your overall look. Do you want a bold statement piece that demands attention, or a more understated design that complements your existing wardrobe? The size of your tattoo sleeve will play a big role in determining its impact.
Placement Considerations: Upper Arm, Forearm, or Full Sleeve?
Where on your arm are we slapping this masterpiece? The upper arm offers a broad, relatively flat surface, ideal for large-scale designs and intricate details. The forearm is more visible, making it a great choice if you want to show off your ink. A full sleeve combines both, allowing for a seamless design that flows from shoulder to wrist. But placement isn't just about aesthetics; it also affects the pain level. Areas with more muscle and fat, like the upper arm, tend to be less painful than areas with more bone and nerve endings, like the wrist and elbow.
Consider your lifestyle and profession when choosing your tattoo placement. Will your tattoo be visible at work? Do you need to be able to cover it up easily? Some professions have strict rules about visible tattoos, so it's important to do your research and make sure your tattoo won't jeopardize your career. Also, think about how the tattoo will look as you age. Skin elasticity changes over time, and a tattoo on the upper arm might sag more than a tattoo on the forearm. These are all factors to consider when planning your urban tattoo sleeve.
Placement | Pros | Cons | Pain Level (1-10) |
|---|---|---|---|
Upper Arm | Large canvas, less painful | Less visible | 4-6 |
Forearm | More visible, good for detailed designs | Can be more painful | 6-8 |
Full Sleeve | Maximum impact, seamless design | Most expensive, longest sessions | Variable, depending on area |
The Pain Factor: Let's Be Honest
let's not sugarcoat it: getting a tattoo hurts. But how much? And for how long? Well, that depends on a few factors, including your pain tolerance, the size and complexity of the design, and the location of the tattoo. As mentioned earlier, areas with more bone and nerve endings tend to be more painful. Ribs, elbows, wrists, and ankles are generally considered the most sensitive areas. The upper arm and thigh are usually less painful.
The length of the tattoo session also plays a role. A long session can be physically and mentally draining, making the pain feel more intense. To prepare for the pain, make sure you're well-rested, hydrated, and have eaten a good meal. Avoid alcohol and caffeine before your appointment, as they can increase your sensitivity to pain. During the session, focus on your breathing, listen to music, or chat with your artist to distract yourself. And don't be afraid to ask for breaks if you need them. Remember, it's a marathon, not a sprint.
- Stay hydrated: Drink plenty of water before and during your appointment.
- Eat a good meal: Avoid getting tattooed on an empty stomach.
- Get enough sleep: Being well-rested will help you cope with the pain.
- Avoid alcohol and caffeine: These can increase your sensitivity to pain.
Urban Tattoo Sleeve Inspiration: From Concept to Reality
Urban Tattoo Sleeve Inspiration: From Concept to Reality
From Mood Board to Masterpiece
so you've got the vision, the style, and the artist locked down. Now comes the fun part: translating that abstract idea into a concrete design. Start by creating a mood board. Gather images of everything that inspires you – photos of your favorite cityscapes, examples of street art you admire, architectural details that catch your eye, even textures and colors that evoke the urban vibe you're going for. Don't be afraid to get weird and eclectic. The goal is to create a visual representation of your inner world.
Once you have a solid mood board, start sketching out some rough ideas. Don't worry about perfection at this stage. Just let your creativity flow and see what comes out. Experiment with different layouts, compositions, and elements. Think about how the different elements will flow together and how they will interact with the contours of your arm. This is where you start to refine your vision and turn it into a tangible design.
Collaborating with Your Artist: Bringing Your Vision to Life
This is where the magic truly happens. Share your mood board, sketches, and ideas with your tattoo artist. A good artist will be able to take your vision and translate it into a stunning tattoo design that exceeds your expectations. Be open to their feedback and suggestions. They are the experts, after all. They can offer valuable insights into what will work well aesthetically and technically.
Don't be afraid to ask questions and voice your concerns. This is your body, and you want to make sure you're completely happy with the design before you commit to it. The more you communicate with your artist, the better the final result will be. Remember, this is a collaboration. You're working together to create a piece of art that you'll both be proud of. Once you have a final design, your artist will create a stencil that will be used to transfer the design onto your skin. This is your last chance to make any changes, so be sure to double-check everything before you proceed.
The Day of the Ink: From Stencil to Skin
It's go time! You've done your research, found the perfect artist, and finalized your design. Now it's time to get inked. On the day of your appointment, make sure you're well-rested, hydrated, and have eaten a good meal. Wear comfortable clothing that allows easy access to the area being tattooed. Avoid wearing anything too tight or restrictive.
When you arrive at the studio, your artist will clean and shave the area to be tattooed. Then, they'll apply the stencil, ensuring it's properly aligned and positioned. Before they start tattooing, they'll show you the stencil in the mirror so you can give it one last look. Once you're happy with the placement, the tattooing begins. Remember to breathe deeply and try to relax. The pain will come and go in waves. Focus on your breathing, listen to music, or chat with your artist to distract yourself. And don't be afraid to ask for breaks if you need them. You're almost there!
Urban Tattoo Sleeve Ideas: Your Story, Inked
Your urban tattoo sleeve is more than just ink; it's a narrative etched onto your skin, a visual representation of your experiences, passions, and the city that shapes you. From exploring diverse design options and understanding placement considerations to finding the right artist, you're now equipped to embark on this exciting journey. So, take the leap, embrace the creativity, and let your urban tattoo sleeve tell your unique story to the world.